Is it safe to write on photographs? What should I use to write on photos?
These are two of our most frequently asked questions regarding archival photo organization and storage. In this article we will help you make an informed decision about how to label your photo collection.

The Short Answer / TLDR
While archivists advise against writing on photographs, they do sometimes do so. The short answer is if you want to write on your photographs use a pencil.
If the photo is older and fiber-based (the back looks like paper) or mounted on board (such as a cabinet card or carte-de-visite) use an everyday #2 pencil and always write on the back along the edges. To avoid indenting the paper, use a light touch or get a slightly softer pencil like a #1 or a 2B.
If the photo is of the modern plastic or resin-coated variety (the back feels almost waxy – this was the standard drugstore and photography studio print from the 1980s onward) use a 4B or 6B Graphite Pencil. For more in-depth information on labeling your photographic collections, read on!


Why Labeling is Important
If you ever visit antique stores or flea markets, you have likely encountered old photographs. Most probably don’t have any identifying information on them. Many people don’t think to write on their photos, because they know who is in them.
Your photo collection is a significant part of your family story. Written information to accompany the photos is important for telling that story. Imagine your photos one hundred years in the future. One of your descendants might be wondering who is in the photos you left behind. You can avoid this scenario by properly labeling your photos now.

And if you have old photos of people you can’t identify, ask family members if they can help you. Sometimes, time is of the essence. Better to try to obtain the information sooner rather than later, even if you aren’t ready to take the deep dive into organizing your collection.
What Information Should You Record
Most digital cameras now automatically embed certain metadata, like date and location, into the image file. Imaging software allows you to add more metadata to your files. AI and facial recognition also help sort digital images. This article is focusing on non-digital metadata to accompany physical photos and prints.
Who
Who is in the photograph and who took it? When labeling the names of the people in the photos, use first and last names, and maiden names when applicable. This can be very useful when creating family trees and doing genealogical research.
What
What is happening in the photo? Is it Julia’s first haircut? Bernard’s high school graduation? The Grant family reunion? A picnic by the Genesee River. Aunt Hazel and Uncle Harold’s wedding?
When
When was the photo taken? Add the date or approximate date. Some photos and photo envelopes include the date that the film was processed. With older photos you might have to do some research. The size, borders, and style of the photo provide clues. And if they are photos of your family members use their age to help narrow the date down.
Where
Where was the photo taken? Identify the location. Grandma Anderson’s house at 99 Elm Street in Utica, NY. Seneca Park Zoo in Rochester, NY. People move around a lot. Include the address, city, and state when you know them.
What Writing Implement to Use
Pencil, Pencil, Pencil! Archivists love the classic, ubiquitous #2 pencil. They will work for most of your archival labeling needs. And most households have one somewhere!
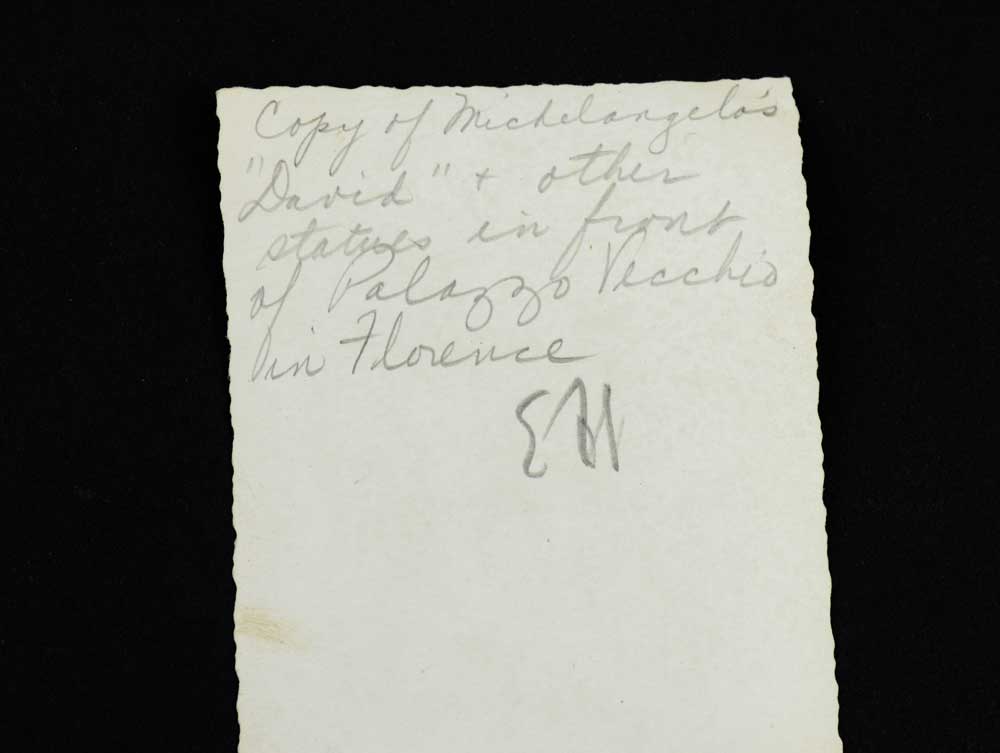
The images below are wonderful vintage examples of pencil versus pen. Both have survived over 70 years but the pencil (archival) is much less damaging than the ballpoint pen (not archival, smeared). Perhaps Mrs. O’Brien added the date in pencil after she received Kathleen and Brendan’s school photos. When labeling school photos, include first and last name, age, grade, and school.

“But Pencil Doesn’t Work on My Photos!”
If this is your dilemma, our friends at the Image Permanence Institute pointed us to the solution – softer graphite pencils. Kodak introduced resin coating to chromogenic prints in 1968 (thank you Graphic Atlas!). The reason they did this was to reduce the print wash times. Resin coating means they added a layer of polyethylene (yes, plastic) to the bottom and near the top of the photographic paper. By the 1980s RC (resin coated) photo paper was ubiquitous in the commercial photo finishing labs. Even many contemporary photos, though not printed in a darkroom, are still printed on a resin coated paper.
For most contemporary snapshots and photographs our recommendation for an archival writing implement is a soft Graphite Pencil. They come in a range of different hardnesses. The 4B and 6B work best for writing on the backs of modern plastic or resin coated photos. They are a softer graphite therefore they leave a darker mark. #2 or HB pencils are medium hardness and won’t work on most of the modern photos. Please note that we are referring to the 4B and 6B Cretacolor Monolith Pencils that we sell. Other manufacturers hardness scales might vary.
Cretacolor Monolith Graphite Pencils
We sell Cretacolor Monolith Graphite Pencils in a few variations. The 7 Component Set (Item #99-GP-MULTI) includes six pure woodless graphite pencils – HB, 2B, 4B, 6B, 8B, 9B – and one small monolith eraser in a metal storage case. The HB and 2B work like a #2 pencil and would be good for writing on the older photos. The 4B through the 9B would work on more modern photos but the 8B and 9B are more prone to smearing because they are so soft. Woodless means that the entire pencil is graphite encased in a thin coating. We also sell packages of two pencils with caps in either 4B or 6B hardness.

These are woodless pencils, so they are solid graphite encased in a thin layer of plastic. This may affect how they sharpen. The metal sharper we sell works well. We tested an automatic sharpen, too. It worked, but I think it would go through the pencil faster than a hand sharpener would.
* Fragility warning! The author of this post discovered via a kitten mishap that the Cretacolor Graphite Pencils are more fragile than traditional wood pencils. A brand new pencil was found on the kitchen floor broken into three pieces from the impact of the fall. One important lesson for the home archivist is to have an animal-free space where you can work!
Some Info on Pens
We do not recommend using pen but you might decide it’s worth the risk. If you feel you must use a pen, use one that is archival. That means the ink, composed of archival pigments or dyes, will resist weathering and fading over time, especially when used with archival paper. Do not use ballpoint pens and others that are not archival as they contain harmful solvents and are prone to smearing.
We carry the archival Sakura Pigma Micron Pens in various line widths. They do not work on resin coated photos but they write well on paper-based ones.
Most archival pens are not great at writing on modern plastic photos. They take a long time to dry and are prone to smearing. Here’s a blog post wherein the author tested different inks and dry times.

Choices for Writing on Fiber-based Photos (in order of preference)
#2 or HB Pencil
- pros: inexpensive, easy to find, approved by archivists, doesn’t tend to smear, can be erased if you make a mistake, fine point (when sharpened) allows for small handwriting, shouldn’t fade if properly stored and handled
Graphite Pencils – 4B and 6B
- pros: approved by archivists, also works on resin-coated photos, can be erased (#2 erases more thoroughly than 6B and 4B), shouldn’t fade if properly stored and handled
- cons: can smear when rubbed because it is softer than #2/HB
Pigma Micron Pen
- pros: clean, fine lines, doesn’t smear, easy to read, archival ink shouldn’t fade if properly stored and handled
- cons: can’t be undone, can’t be erased, archivists do not approve of writing on photos with any ink, archival or not
Labeling Options
Here is an outline of some options for labeling photographs. Read on for more details.
- Writing directly on the back of a photo
- Writing on paper adjacent to the photo, such as on an album page or card stock insert
- Writing on the paper enclosures, sleeves, or envelopes
- Making a master key or reference sheet
1. Writing on Photographs
If you plan to write on the back of your photos, use a medium to soft Graphite Pencil that will not indent the paper. Place the photo on a firm surface to also avoid indentations. Also, to safeguard the middle of the image, which is the main focus, write along the edges of the paper. Again, if it’s an old photo printed on an uncoated paper, a #2 or HB pencil is our top choice.
The advantage of writing on the back of a photo is that the information will always stay with the image. Just be sure to properly store your photos in archival materials, out of direct light, and in a climate controlled environment. Wear Nitrile or Cotton Gloves when handling photos to protect them from the naturally occurring oils on your skin.
2. Writing on Archival Paper Adjacent to the Photo
Index Cards
Long-term archival photo storage usually involves an Archival Metal Edge Box, an Archival Portfolio or Case, or an Archival Binder with archivally safe Binder Pages. If you store your photos loose in a box, without sleeves or envelopes, you can use Archival Index Cards to sort photos and write information on them. This works best with 5 x 7″ and smaller prints that can be stored upright and labelled in batches.

Binder Pages and Card Stock Inserts
If you are using Archival Binder Pages, you can write on the Card Stock Inserts, Card Stock Mounting Pages, or archival paper that are supporting your photos. While we recommend using a pencil, if you do opt for an archival pen test the paper first for “bleed through.”


If you have larger prints to store you can get a Drop Front Metal Edge Box to hold them. They are available in 1-1/2″ depths and 3″ depths and the smallest size is for 8 x 10 photos. The drop front feature makes accessing your items safe and easy.
For added protection, use any archival envelope or sleeve. The polypropylene 3-Sided Sleeves and Crystal Clear Bags are great choices. The polyester Side Loading Print Sleeves are another excellent option. Add Card Stock Inserts for support and a place to write down information about the photo.
Can I Stick a Label to the Back of the Photo?
Someone recently asked this question so I am adding this info. Archivists recommend against putting stickers or post-it notes on the backs of photos because neither is archival and stickers are not reversible. If this is something you really want to do you could try a DIY method writing labels on archival paper such as our Permalife 20lb Bond Paper. This paper is suitable for ink jet and laser printers so you could print info and cut out small labels. Then use archival, reversible E-Z Dots to adhere the labels to the backs of your photos.
3. Writing on the Archival Paper
If you opt to use Paper Envelopes, you can use a pencil or an archival ink pen to write on the envelopes. Just remember to always write on the enclosure before you insert the photos!

Our Archival Photo Envelopes are designed like the old photo-mat envelopes with a small front pocket to store your negatives (if you have them) with the photos. The difference is that our envelopes are made from acid-free paper and have space to write notes about the contents.


Some people use archival Plastic Sleeves to enclose their photos. One advantage to this is that the plastic is translucent so you can see the contents. You can add a Card Stock Insert and write info on this using pencil. We offer Sleeves and Bags in three archival plastics – polypropylene, polyethylene, and polyester.

4. Making a Master Sheet
You can make a “master sheet” to store inside the box or binder with the photos. The master sheet or key can be a document outlining what is in each storage box.
Simple master sheets are a good idea to include in all of you boxes and binders if you have the time to make them. You would make two copies of each sheet. One goes inside the binder or box with the contents, and the other goes into a master binder with all of the sheets. If you want to be thorough, print on Archival Bond Paper.
One way to make a master sheet would be to have digital files of your images output as thumbnails. You can add the meta data (who, what, when, where, etc…) next to each thumbnail reference image.
Label Your Boxes!
Label your boxes and binders. Use a system that works for you. You can use a number or letter, if you have a corresponding “key” to what’s inside each box. Or use a short, descriptive label such as a time frame or side of the family. You can use a pen with archival, lightfast ink or a pencil. Again, we can’t stress enough the importance of proper storage climate and environment, and storing your boxes and binders away from fluorescent lights and sunlight.
We carry Adhesive Back Vinyl Labels in four different sizes that you can use to label the outside of your boxes and binders. They come with Card Stock Inserts for hand-written labels. If you’d prefer a computer print out, we have PDF printing templates under the Resources tab on the product page.
One advantage to using these labels rather than writing directly on the box or using a printable sticker is that you can remove the insert and add a different one down the road, if needed. Also, do not use thermal label printers because this process is not archival and it will fade!
Sorting and safely storing your family archive is a big step! But being able to easily find and access particular items in your collection is also important.
Contact Us
We hope you’ve found this blog post helpful. Please call or email us if you have questions or comments. We frequently learn and improve through interacting with our customers! Don’t forget, if you are in the Rochester, NY area you can select free, easy pick-up when checking out to save on shipping.
UPDATED: December 22, 2025