If you’ve taken the correct steps to archivally store your artwork, photographs, family history artifacts, and collections can you locate a specific item when you need it? This blog post shows you how to create a finding aid for your collections.
Document Your Materials in Quick Photographs
We will use a some antique prints as an example of what should be done for easy archival storage and organization. The techniques can be applied to everything you might have in your own art or photography portfolios, collections, and family history archive!
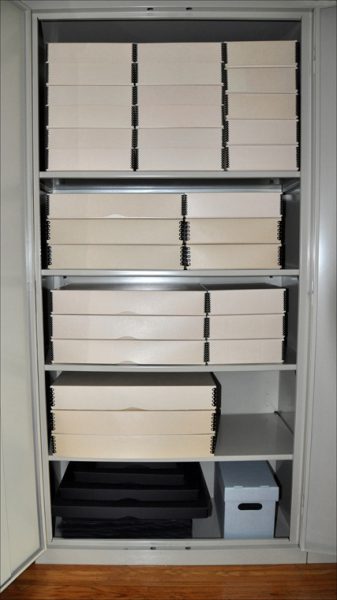
Our Metal Edge Drop Front Boxes are versatile and economical. They come in tan, gray, and black, in 1-1/2″ and 3″ depths, in a wide variety of sizes. The metal edging creates stacking strength. They’re archival, acid-free and made in the USA.
While we’re going to use a Drop Front Box to store these prints, the same procedures apply to the materials you’re storing in Onyx Portfolio Boxes, Museum Drop Front Boxes, Document Storage Kits, even Archival Binders!
The first step involves making a few quick photographs of the prints that are going to be stored in an acid-free Drop Front Box.

When it comes time for you to do this simply arrange your materials on a dining room table or the floor (place a clean sheet down first).
You can photograph individual items or shoot a group of materials that are all going to be placed in the same box. A digital camera or phone will work fine for this project. We are creating a visual inventory of everything that is going to be placed in our Drop Front Box!
As you photograph the items going into the box jot down some quick notes and titles of what you’re photographing.
Place Your Materials in Archival Enclosures
In the case of our two dozen antique prints, we’re placing each one in its own individual Crystal Clear Bag. Archivally-safe Polyethylene Bags can also be used for this step. In either case, using a clear bag will allow you to see what is in each enclosure while still protecting the prints from fingerprints and outside contaminants.

We’ve placed a piece of archival Card Stock behind each fragile print for added rigidity and support—and while not absolutely necessary, it’s a good idea!
Next, we’ve placed the prints—in their individual archival enclosures—into an appropriately sized acid-free Drop Front Box.

Here our box is all buttoned up and ready for everyday access to our prints and long-term archival storage. Only one little problem: just what is in this box?

Label Your Boxes, Portfolios, and Binders
Use Adhesive Backed Label Holders, available in several sizes, to label your archival boxes, portfolios, and binders. Hand write identification information on the included pre-cut labels, or use our label templates and print this information out and trim it to size. Label templates are available under the Resources tab on the product page.

Here’s an example of a label that lists the titles of 14 of the 24 prints we’re storing in our 11×14″ drop front box. The glaring problems here are: the font is unreadably small and we can’t fit the titles of all 24 prints on this label. An alternative recommendation? Just assign each box a number.


Compared to the label on the smaller box, you can see this label from across the room!
The color printout in the 8.5 x 11″ archival Print Page that’s on top of the larger box is a simple visual inventory.

Make Two Visual Inventory Sheets for Each Box
This sheet of regular 8.5 x 11″ letter-sized paper shows the prints we photographed at the beginning of this blog, with each print’s title added at the bottom. A copy of this and the other visual inventory sheets we made – covering all 24 prints being stored in our box – will be placed in the top of the box before we close it. While this example is in color, a black and white version can also be used.

We downloaded this photograph from our camera or phone onto our computer, and then dragged it onto a word document so that we could add the titles we jotted down earlier.
Notice that we’ve named the box that holds these Prints Box 3, but you can use whatever personalized descriptive information you’d like.
This archival Drop Front Box holds two dozen antique prints in individual Crystal Clear Bags with Card Stock added for support. An Adhesive Backed Label Holder has been added to the box. The visual inventory sheets will be placed on top of the prints before we close the box. By opening the box and using these sheets as a reference, we can see exactly what the box contains without having to sort through every print.

Archival Storage: Step 5 – Create a Binder of Visual Inventory Sheets
We made two copies of the visual inventory sheets. One copy went into the box, so that just by opening it we could quickly see a visual inventory of everything the box contains without having to shuffle through all the prints.

The second set of sheets is going into a binder that contains the visual inventory sheets for all our boxes, portfolios, and binders. Looking through this binder to find the exact box holding a particular print or object is much easier than looking through every box for a single item.

Following these simple steps for archival storage and organization. When you need to find an image or object in your collection refer to your binder of visual inventory pages.
Contact Us
If you have any additional questions, or would you like more information on any of our museum-quality acid-free storage & presentation materials, please contact us here at Archival Methods. We’re always there to help with any archiving, storage, or presentation questions you may have.