We’ll take a look at some of the best practices for hinging your own window mats. It’s a simple process and you’ll only need a few inexpensive tools. Here’s a short video demonstrating the process.
The Tools You’ll Need
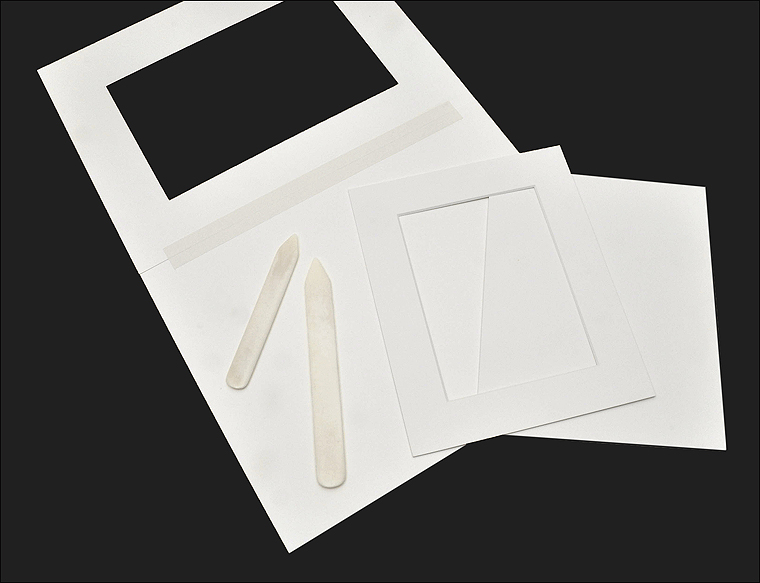
Some of the tools you’ll need for hinging mats: a pair of sharp scissors for cutting your hinging tape, a Burnishing Bone in the size that suits you, a roll of Tyvek or Linen Tape for the actual hinge, a clean sponge or rag if using Linen Tape, and a clean work surface.

Depending on which technique you use to hinge your mat, you may also need a utility knife or X-acto blade. Always work with sharp blades. Make sure you wipe off any oil that might be on a new blade, as they are often coated during manufacture to prevent them from rusting prior to purchase.
Hinging Tapes
Archival Methods generally recommends two types of tape for hinging mats: self-adhesive Tyvek Tape and moisture-activated Linen Tape.
Tyvek Tape is easy to use, as you just cut the length you need, peel off the backing, apply it to your mat and backing board, and burnish it down with a Burnishing Bone.
Linen Tape adds another step, as it’s water-activated and you need to moisten it before joining your mat and backing board. Linen Tape is a bit more forgiving if you need to reposition your tape when hinging.


While both tapes work equally well and are 100% archival, some “purists” insist on using Linen Tape as it is the traditional material for hinging mats at major museums, galleries and frame shops, while Tyvek Tape offers peel and stick convenience.
Measuring Your Hinging Tape
Both Tyvek and Linen Tape come in 1″ and 1-1/2″ width rolls. The extra width of the 1-1/2″ tape will add a bit more surface area to your hinge.
For 11 x 14″ mats and smaller, 1″ hinging tape will work fine. For anything larger than this consider using the 1-1/2″ width.
If you’re still not sure, go with 1-1/2″ and you’ll be all set for any size hinging you need to do.

As for length of your hinge, there are two schools of thought. In this photo of a unassembled mat the hinge does not extend from edge-to-edge. This is perfectly fine, as you will find everyone from museum professionals to gallerists to Archival Methods hinging mats this way.

In this one the hinge does extend to the edges, in fact it runs past each edge on purpose and you will need the sharp knife mentioned above to trim the excess tape once it has been adhered.

So what should you do? It’s personal a choice. The first method is more efficient and less wasteful since there’s no trimming involved. The second method is a traditional, alternate way to hinge your mats.
Hinge Along the Top or on the Longest Edge
In terms of which side to hinge your mat, some individuals will always hinge along one of the long sides. In theory a long-side hinge will lend greater structural support. Others will always hinge across the top of the mat (this will be a long side for a horizontal mat and a short side for a vertical mat), as that is a traditional standard practice. In the end it too is a personal choice.
Common Hinging Mistakes
Hinging mats is a relatively straight-forward process of orienting your window mat and backing board correctly; then lining up your hinging tape dead-center over the junction of the two pieces of mat board.

In the photo above there are two fairly obvious problems. The two contact edges are in fact not in contact (there’s a significant gap at the top). And the tape has been placed on a diagonal across the areas we wish to hinge. It is not parallel to nor evenly centered on the seam.
By practicing a few times with scrap board you’ll get the hang of addressing these issues correctly.
Here’s another potential problem. In the photo below: 1. the tape is running straight, and it perfectly straddles the junction between the window mat and the backing board; 2. the window mat and backing board are lined up correctly; 3. but we didn’t flip the window mat over and have thus applied our tape to the front, beveled side of the mat = trashed mat. Be sure that the beveled side of your mat faces down when hinging.

Here’s the last common mistake we’re all familiar with. This is a “weighted” mat, which means that the bottom border of the mat is a bit wider than the top border. This “weighting” is done by most museums, galleries and frame shops to make the mat look proportionally correct when it’s hanging on the wall.
This is another problem of orientation, as we’ve inadvertently hinged the bottom of the mat (where the “weighing” is) and not either the top or side, where your hinge should always be located.

Hinging Mats: How to Do It Right
In this photo we’ve used Black Museum Board for the window mat and backing board because it makes the mat’s window at the top and the tape hinge in the center more visible.

To review, always make sure that you have the top window mat oriented correctly, which is 1. upside down, and with the bevel away from you—so when you close the mat after hinging it will be correctly oriented. Also make sure the “weighted” side of your window mat is toward the top when opened like this, so that it’s at the bottom when it’s closed.
Cut the Tyvek self-adhesive tape or water-activated Linen Tape to your desired length, usually within a half inch of each side of the mat board if not going edge-to-edge.

If you wish to hinge edge-to-edge, go about 2″ past each side for your hinge to extend across the entire mat.

Helpful Hints: 1. If using a sponge to moisten your Linen Tape, we recommend using a sponge that you reserve only for hinging and not anything else. 2. Moisten your tape on a separate sheet of cardboard or wax paper to keep excess water off your work surface. 3. When using Linen Tape try moistening a few pieces of practice tape in order to get a sense of the correct amount of water to apply—too much moisture might saturate your mat and too little might not offer good adhesion.

When applying your hinging tape, straddle the seam between the top and bottom boards so that the tape is dead-center.

Then use a Burnishing Bone to burnish down your tape to ensure good contact and adhesion.

If you’re running your hinge across the entire length of your mat, carefully trim it with a sharp knife by using the edge of the hinged mat as a guide. We recommend doing this on a Self-Healing Cutting Mat or on a piece of scrap mat board to protect your work surface.

After completing all the steps above, close your mat and “square it up” a bit to make sure the hinged window mat and backing board are in alignment at the hinge, and you’re done!
Now your mat is ready to mount your image!

Let Us Do the Work!
Archival Methods has an easy-to-use Custom Mat Ordering Form where you can select your custom size window mat from a variety of archival matboards. You have the option to order it with or without a backing board, and whether or not to hinge on the long or short side or not at all. We hinge with archival linen tape.

Some photographers, artists, and collectors prefer to hinge their mats themselves, so Archival Methods has created products that offer the flexibility of hinging your own mats.

If you would like more information on matting, or on the archival storage and presentation materials that are right for you, please contact us. We’re always there to help with any archiving, storage, or presentation questions you may have.