If you are looking for information about storing contemporary tintypes and ambrotypes, we have different recommendations. Please visit How to Store Contemporary Tintypes and Ambrotypes.
What is a Tintype?
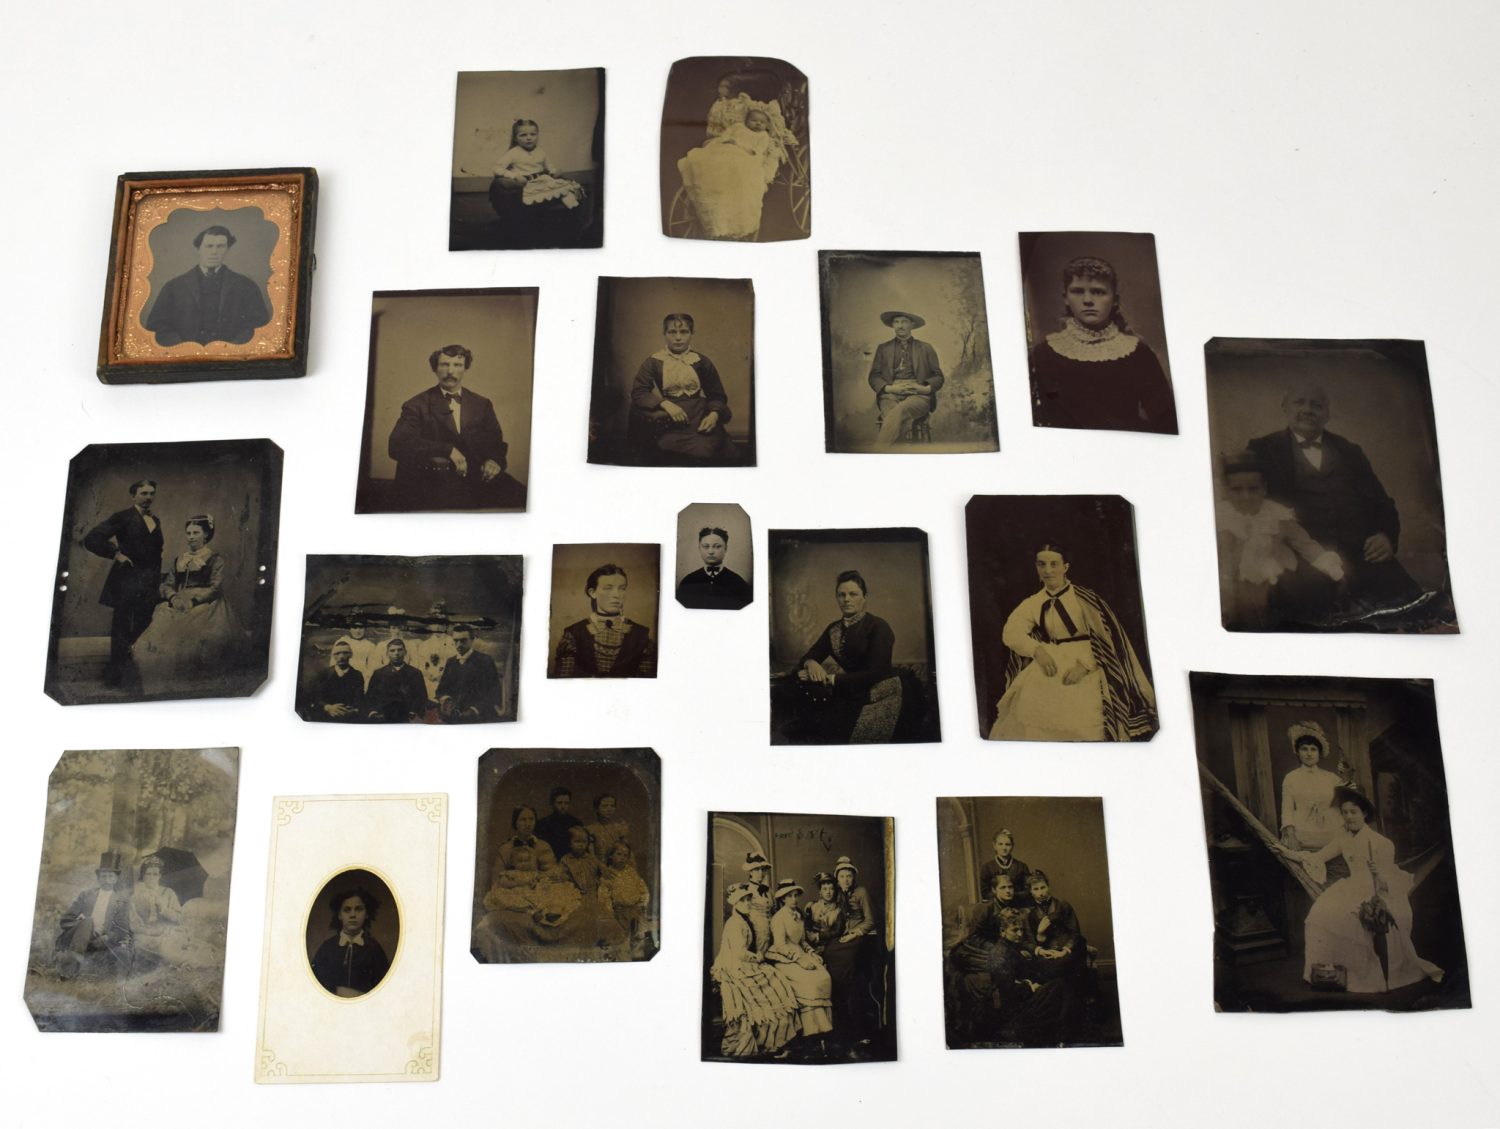
Ferrotypes, more commonly known as tintypes, became a popular photographic format beginning in the late 1850s. Photographers used the wet-plate collodion process to make these one-of-a-kind images on pieces of lacquered iron (not tin!). On tintypes the image is usually reversed, but unless there’s text in the photograph, it’s hard to tell.

Unlike the negative/positive printing processes, most tintypes were unique. One exposure resulted in one photograph, just like a Polaroid. Sometimes multiplying lenses were used to make multiple exposures on one plate, and then cut apart after processing.
A tintype is actually a thin negative that appears as a positive image when backed with something dark. This is why the iron plates were pre-coated with black or brown lacquer.
How to Identify a Tintype
A tintype is usually easy to identify because it is a photograph on a piece of metal. They are harder to identify if they are in a traditional case, and can often be confused with ambrotypes and daguerreotypes. Ambrotypes use the same wet-plate collodion process but the images are on glass instead of metal. When cased it is sometimes difficult to tell the difference between the two. You can hold a magnet up to the case. A tintype, being iron would have a magnetic pull.
Graphics Atlas is an excellent resource that provides extensive information about various photographic processes from all eras.

Daguerreotypes, though cased like ambrotypes and tintypes, are distinctly different. The highly polished silver-coated plate gives a daguerreotype a mirror-like quality that is absent from tintypes and ambrotypes. But beware, as oftentimes people get them confused and mislabel them.
How to “Read” a Tintype
All photographs tell a story. But different processes and eras have different cues for interpreting them.
Tintype edges are usually rough and unfinished, showing the handmade aspects of the process. Each photographic plate was hand-poured and hand-developed by the photographer or their assistant. Chemical pour lines, photographers’ fingerprints, and crudely cut metal edges are often visible. They were usually placed in a case, frame, or paper mat to hide these imperfections along the edges.

Tintypes that have survived the last 150 years frequently appear in modern collections without any mat or frame. They may show dents and scratches acquired after years of casual mishandling.
Skylight Studios

Most tintypes were made inside studios that would have had skylights to let in a lot of sunlight. The wet-plate collodion process is sensitive to the blue end of the light spectrum and requires a good deal of ultraviolet light to make a proper exposure. Staying still for several seconds or longer isn’t easy for most people.

Studio Props
Head braces were sometimes used to immobilize the sitter’s head from behind. Columns and other tall props were used to lean standing people against to help them stay still during the exposure. Notice the standing woman’s fingers on the tree trunk in the above image. She managed to stay more still than the other two seated people in the photo. It is generally easier to remain still when seated, rather than standing.

In the above portrait, the heavy metal stands behind the two standing children are slightly visible behind their feet. These stands had an adjustable head brace attached that would help keep one’s head from moving during the exposure.
Painted backdrops were usually used behind the sitters. They often featured an idyllic outdoor scene, but they varied greatly, and some imitated a lavish home interior.

Tintype Identification
Most tintypes do not include written information about the subjects because they were not easy to write on. Tintypes that were cased, in paper mats, or in albums, are more likely to have identification with them. In cased images people sometimes added a lock of hair and/or a note with the sitter’s name on it. But it would have been hidden underneath the image or the velvet. Please note, we do not recommend taking a cased image apart! In the tintype above of the two young ladies, we are fortunate that someone identified the sitters at some point in time.
Using a hammock as a seat is very unusual, especially because a hammock is not the best choice for keeping someone still. The wooden booth behind the hammock is another example of a prop used to stabilize standing subjects.
Storage Steps for Tintypes
Please note that this information is regarding the storage of historic, antique, and vintage tintypes, not modern-day tintypes! A companion blog post about storing contemporary wet-plate images is here.
Gather and Record Information
As mentioned, tintypes frequently lack identifying information. If you are lucky enough to have names, dates, or locations associated with your tintypes, keep the info with each image until you begin sorting and storing them. Ask family members if they have any information about the images that you can record and add to them.
Scan or Photograph Your Tintypes
You can use a scanner or camera to make digital copies of your collection, or you can hire someone else to do it for you. Scan at a high resolution to enlarge the image and see details you couldn’t easily see with the naked eye. You can share digital files or copy prints with family members. You could also opt to frame an enlargement, or the original! Add metadata to the files when you have relevant information to accompany the images.
Storing Tintypes in Binders

Now that you understand more about these little images in your collection, let’s discuss how to store them. One option is to put them in Print Pages with Archival Card Stock Inserts to add support and to separate them. Then put the pages in an Archival Binder of your choice. You can use a #2 pencil or an Archival Pen to write on the card stock inserts when you have information to include with a tintype.
As a collector of found photos and user of Archival Methods products, I found that while I love the Pocket Pages for paper photographs, I do not like storing heavier photos such as tintypes and cabinet cards in them. I find the tintypes to be a bit cumbersome in the binder pages. I think it’s fine if you only have a few, but for large amounts I like a box storage option. I prefer to store my 19th century photos in sleeves inside of one of the Create-a-Kits which come with modular caddies for separating and sorting.

Storing Tintypes in Sleeves in Boxes
Another option is to store your tintypes in an archival Metal Edge Box. Because tintypes are metal and likely to damage adjacent images, we highly recommend putting them in Bags, Sleeves, or Envelopes inside the box.

High Density Polyethylene (HD Poly) Envelopes are an excellent choice. While they have a frosted appearance and are not as clear as the other plastics, their anti-static qualities reduce the risk of scratching or abrasion from entrapped dust particles. HD polyethylene is one of the few plastic sheet materials with no slip agents added to the surface. Other polyethylene, polyester, and polypropylene materials need slip agents to prevent the plastic from sticking to itself in rolls or sheets.
Do not use polyester (sometimes called Mylar) sleeves to store tintypes. They have a static charge that can be detrimental to tintypes, especially if there is damage, rust, and flaking of the image.

Storing Tintypes in Original Albums

You might have some tintypes in an album such as the one above. Oftentimes people prefer to leave a family album intact. The yellow, brittle pages of this album are typical and definitely not archival. The acids and lignins in the paper are less harmful to tintypes than they are to paper-based photos such as cabinet cards and cartes-de-visite.
You could interleave album pages with Buffered Archival Tissue in order to slow down the acid migration and add some protection. But sometimes, the spine of the album will not have enough room to add interleaving to every page. Store your vintage photo album in a Book Storage Kit which includes an archival Metal Edge Box and two Polyethylene Bags.

Please contact us via phone or email if you have questions or concerns about archivally storing your tintypes and other treasured photographs and artifacts.
Updated on November 13, 2024
Updated on June 28, 2024
Updated on February 12, 2024