Frame your photographs and artwork at home using archival supplies from a trusted supplier. At Archival Methods we offer do-it-yourself Wood Frames and Metal Frames. This post is about our Gallery 12 Wood Frames which come in black, white, and natural finishes.
Kit Options Include Size and Finish
You can choose from three finishes for your wood frame. The maple frame has a natural clear finish that shows the color and grain of the wood. The other two frames are made of poplar and come with a white or black satin finish. We offer all of these finishes in five sizes: 11 x 14, 16 x 20, 18 x 24, 20 x 24, and 22 x 28. Please note that the frame size listed refers to the size of the mat board and glazing that the frame accommodates.

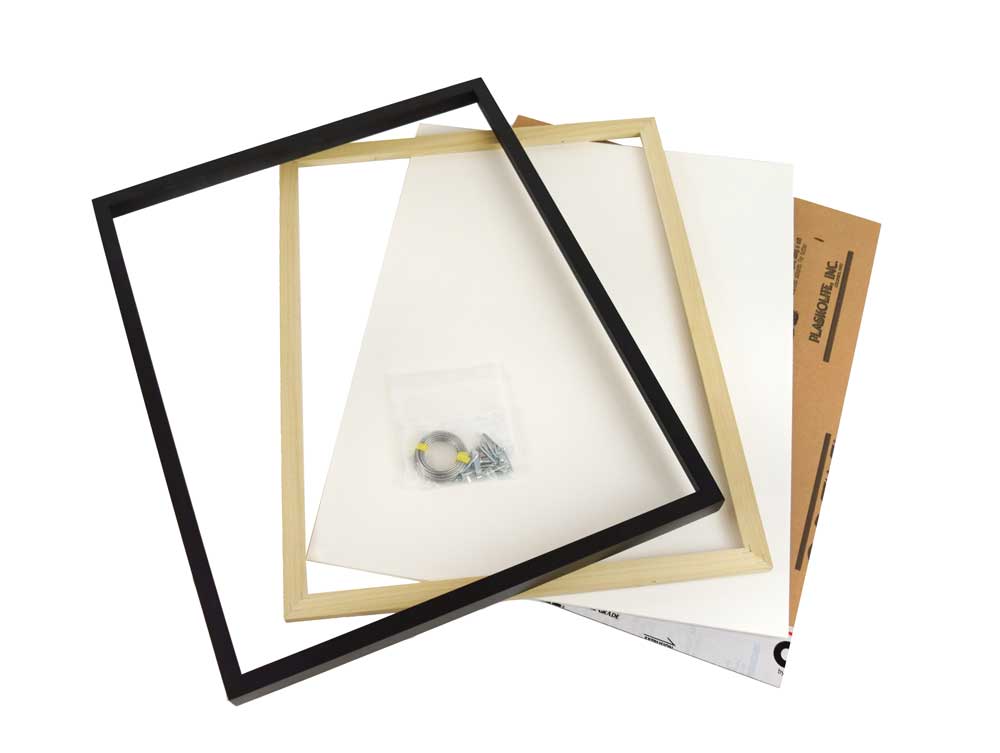
Wood Frame Kit Contents

What the Kit Does Not Include
This Wood Frame Kit doesn’t include a Phillips head screwdriver, which is needed for assembly. It also does not include a window mat for your artwork. If you are new to archival framing you might be wondering what that is.
What is a Window Mat?
To frame something archivally, the artwork should not be touching the glazing (glazing can be either glass or plastic but it should have a UV-filtering coating to prevent light damage). To separate the artwork from the glazing many people use an archival window mat. Visit this blog post for more information on window mats.

The three different plies of archival mat board that we offer.
Assembling the Frame
Let’s assume you now have your artwork properly mounted in an archival window mat and are ready to assemble your Wood Frame Kit. The outside dimensions of your mat will be the same as your glazing and frame kit. If you’re a visual learner here is a video with Wood Frame Kit assembly instructions.
If you would prefer to read, here are step-by-step instructions. You can also download them as a PDF.
- Have your matted artwork ready to frame. We recommend you wear gloves and work on a clean surface during this process.
- Peel paper backing from one side of acrylic. Use your fingernail or carefully use a blade to get the peeling started at one corner. Use a tube at least as long as the diagonal measurement of your acrylic to carefully roll the paper away from the acrylic. Keep the paper against the roll to avoid tears.
- Use an air blower to remove any dust on artwork and acrylic before placing the artwork facedown on the acrylic. Flip over and remove paper from other side.
- Insert acrylic and matted artwork facedown into the frame. Next, place the foam board on top of them as a backer.
- Once all layers are in the frame you can attach the strainer to hold them in place. Place the strainer with the beveled edge facing you.
- Use a Phillips head screwdriver to attach the strainer with the enclosed screws in the pre-drilled holes. There are no holes in the frame so screwing in by hand can be challenging, but it is possible. If you have a drill with a screw bit you could use that, but be very careful that you only start a pilot hole. You don’t want to accidentally go through the side of the frame!
- Once all the screws are in place it’s time to attach the hardware for the hanging wire. Figure out which side is the top of your frame. Measure from the top edge about a third of the way down. ie: if the top to bottom of your frame is 16″ then measure down 5″ and mark it with a pencil on both sides on the strainer.
- Attach your wire hanging hooks to the strainer with the short screws where you marked with pencil. (not to the frame as seen in the video!)
- Attach wire to a hook, looping through the hook twice and then wrapping the wire around itself. Leave several inches for wrapping. ie: if frame is 20″ across measure about 28″ of wire. Then bring wire straight across to other hook and attach in the same way.